


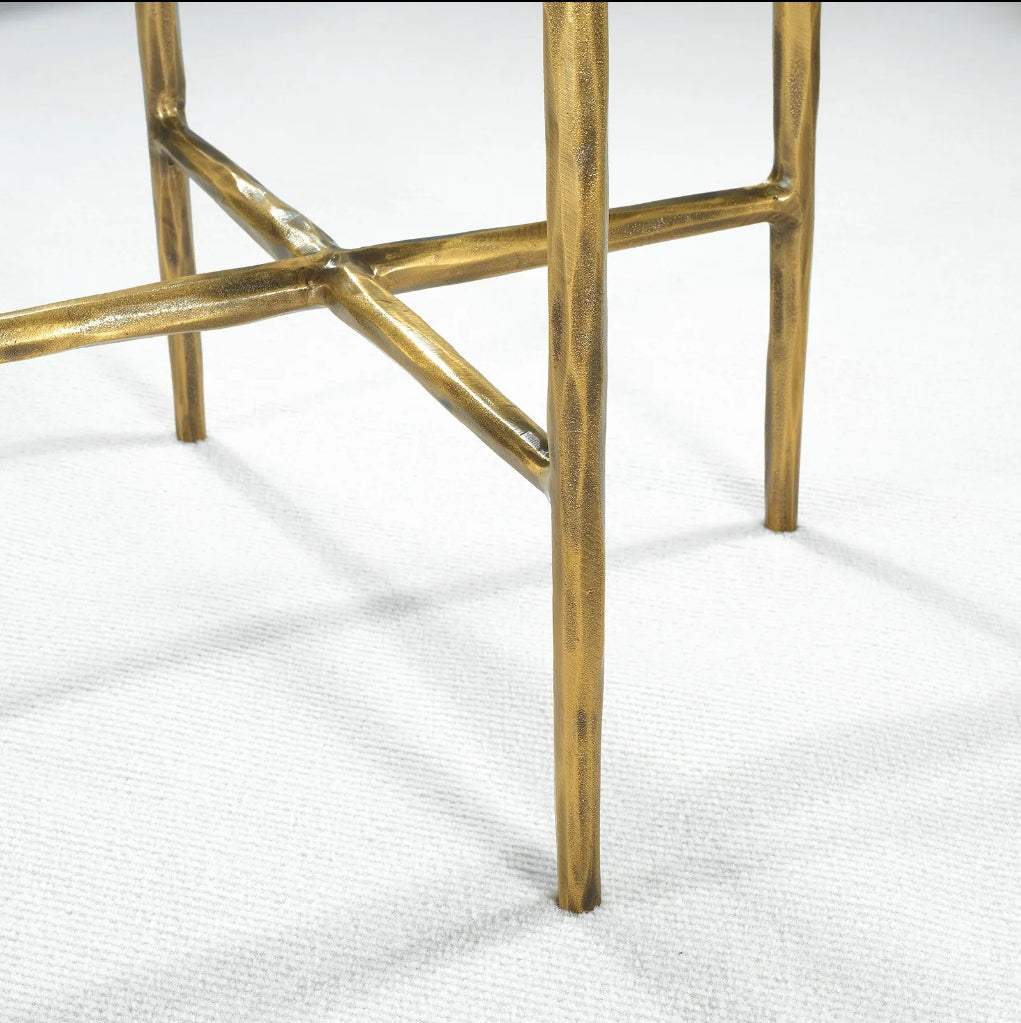

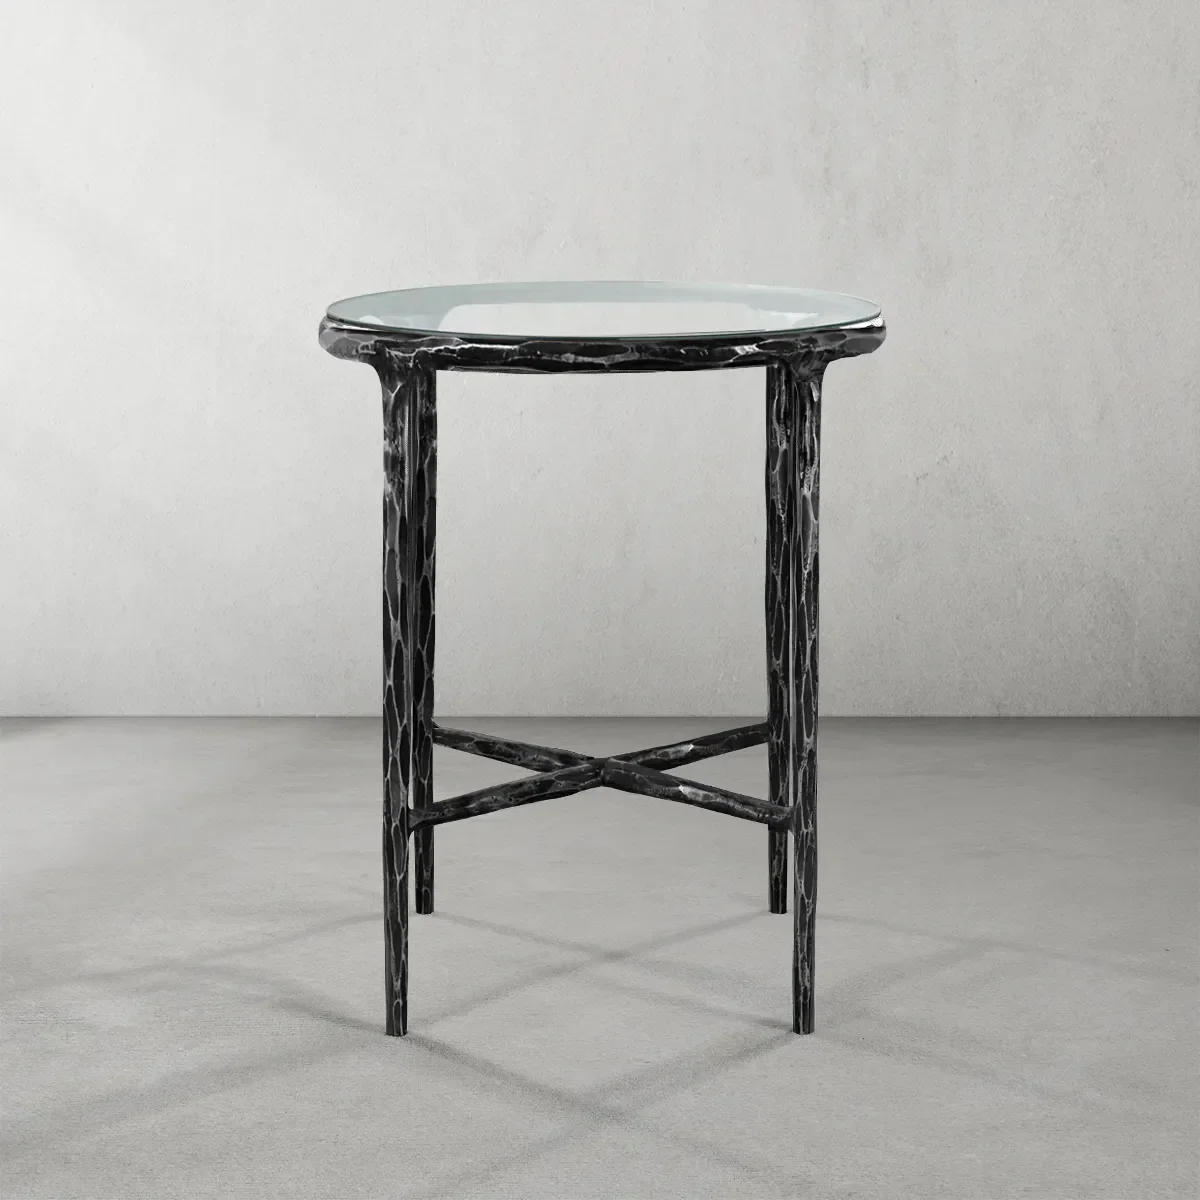


Vintage Forged Glass Round Side Table 18" 22"
-
We offer 24-hour chat support
-
LED Bulbs Included
-
Certification: UL / CE / SAA
-
Free Shipping On All Orders
-
Secure payments
-
Free return within 30 days

Shipping information
Free Shipping On All Orders
Shipping Cost & Transit Time
Cloudslightings provides free standard delivery service for all orders on the website.
Country Estimated Delivery Time
Canada, USA 6-15 nature days
Australia, New Zealand 7-15 nature days
Austria, Belgium, Denmark 7-15 nature days
France, Germany, Ireland, Italy 7-15 nature days
Netherlands, Norway, Spain 7-15 nature days
Sweden, Switzerland, UK 7-15 nature days
Japan, Korea, Malaysia 7-15 nature days
Singapore, Philippines 7-15 nature days
Greece, Cambodia 7-15 nature days
Note: If the light package size over 36″, we will choose ocean shipping according to the situation, and the ocean shipping time is about 20-25 nature days.For all the furniture, we will offer sea shipping,shipping date will be 34-40 nature days. We will communicate with customers in advance. If the customer’s package is oversized, but want to get the product quickly, you can contact us (support@cloudslightings.com).
Total delivery time = processing time + shipping time (depending on your location)
If you have any questions, you can contact us directly at email: support@cloudslightings.com
For more details, please refer to our Shipping policy.
For all the furniture, we will offer free sea shipping,shipping date will be 34-40days.
Return & Refund Policy
To ensure that you are satisfied with your purchase from Cloudslightings, we provide video check and a 30-day return policy.
Before shipping, We are willing to provide packaging videos of your item(s) to show the details of the lights and package. Videos will be sent by email if you need it.
For more details, please refer to our RETURN & Refund Policy.
Size Guide

How to install chandelier correctly
We want you to be safe while installing your beautiful chandelier! Refer to these guidelines to help preventaccidents and any damage. Be sure to consult your owner's manual for more detailed installation instructionsor consult your local electrician. Remember to turn off the power before starting to install your new chandelierfor safety purposes.
General Height Calculation
To figure out how far your chandelier should hang, we recommend 3" for every foot of space between the flooiand ceiling. Simply multiply the height of your ceiling (in feet) by three. For example, if your ceilings are 8' highyour chandelier should be 24" tall (8 x 3 = 24).
Room-Specific Height Calculation
Dining Room
Hanging Height: The bottom of the chandelier should hang 30" - 36" above the table.
Where to Hang: Center the light above the middle of the table - not the middle of the room.
Kitchen Island
Hanging Height: The bottom of the chandelier should hang 30" - 36" above the countertopWhere to Hang: Center the chandelier in the middle of the island.
Entryway, Bedroom, or Living Room
Hanging Height: Always have 7' of clearance between the bottom of the chandelier and the floor.Note: For ceilings taller than 8, mount the chandelier an additional 3" higher for every extra foot above 8!Where to Hang:
Entryway: Center the chandelier in the middle of the space.
Tip: lf you have a large foyer, place it over a round table for a bold statement!
Bedroom/Living Room: Place the chandelier in the middle of the room or above a bedside or coffee table.
Bathroom
Hanging Height: Mount it at least 8' above the highest point from the tub's edge.
Where to Hang: Due to strict building codes for wet environments, the chandelier must be at least 3' to theside of the tub or shower.
Caution: Make sure that the chandelier is enclosed or made for moisture-rich environments.
How to Install Your Chandelier
1. Turn off the power. Safety first!
2. Attach your electric box, Make sure it is secure and free of any frayed wires.
3.Assemble your chandelier. Follow the instructions in your user manual before hanging it up.
4. Measure the chain. Use the tips above to ensure it hangs at the perfect height.
5.Attach the chandelier to the electric box. Refer to your user manual for instructions.
6. Connect the wires. Most chandeliers will have a black wire and a white one. Twist the stripped end of theblack wire from the ceiling to the fixture. Repeat with the white wire. Place the wires back in the electric boxand secure it until it is closed.
Please note this step can be tricky, so reach out to an electrician for assistance if needed.
7. Screw in your lightbulbs. Enjoy your new light fixture!